Stay Ahead in Quality Assurance: Discover What's New in MetMaX 5.0
With the latest software update, we're taking your measurement processes to the next level – smarter, more efficient, and more user-friendly than ever before. Whether it's precise Real3D Measurement on CAD, Offset Clamping, flexible Adjustment of Waypoints when contour scanning, or Enhanced Data Processing: the new features give you greater control, enhanced automation, and higher quality in every step of your workflow.
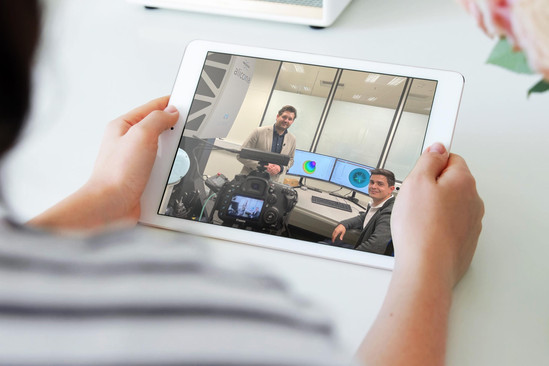
Discover more details in our What's New Video. Watch now and start benefiting right away 👉.
⬇️Or scroll down to discover the key features at a glance!
Unlock Smarter Workflows & Enhanced Performance Today!
Explore What Makes MetMaX 5.0* a Must-Have Software Package
Real3D Measurement on CAD
Complete Form Measurement Directly on the CAD
Welcome to the future of component inspection: This new feature allows you to create Real3D measurements on CAD - fast, intuitively, and with highest precision. The teach-in is easier than ever: simpy click on the CAD to select the measurement volume and let the software do the rest. Fine-tune your measurement data within the measurement plan, tailoring it precisely to your needs.
Gain a decisive advantage: Get precise control over your measurements, allocate ressources more effectively, and detect potential errors early.
Offset Clamping: Virtual Clamping has Never been this Easy
In metrology, precision is paramount. But often, your virtual CAD doesn’t exactly match the real component coming off the production machine. Until now, the real, manufactured part had to be manually aligned with the virtual CAD, a step that required care and could take additional time.
Offset Clamping revolutionizes this step: By entering offset data – either manually or via a file – the real component is aligned to the virtual CAD. Simply load the CAD, activate Offset Clamping and the part is clamped correctly, and the measurement starts.
This saves time, reduces manual effort, and brings you one step closer to fully automated quality assurance.
Contour Scanning: More Flexibility when Editing Waypoints
You are already familiar with the scanning of continuous contours beyond a single field of view.
Now new: For maximum flexibility, you can now easily duplicate contour measurements and select, insert, or delete waypoints from the LiveView as needed. Optimized illumination ensures the highest data quality – even under challenging conditions.
➡️ Now available for all FocusX customers with the Probing Package.
TXT Export: Seamless Integration of Measurement Results into Existing Workflows
The new TXT export feature makes connecting to your internal systems easier than ever. As part of an automated measurement process, you can precisely define which content should be exported – from keywords and headers to results.
The format is highly customizable: structure, content, and formatting can be flexibly configured to meet your exact requirements.
More Power Unlocked: Additional Enhancements in MetMaX 5.0
Real3DUnitX: Mount/Unmount Wizard
For FocusX users
The new mount/unmount wizard assists you in safely and easily mounting and unmounting your Real3DUnitX rotation unit - ideal for applications that require more space. The guided user interface leads you step by step through the entire process – from uninstallation to reassembly. Fast, safe, and user-friendly.
Specimen Table now Available as Hardware Grip
The specimen table is now included in the software as standard and is available as a hardware grip directly in the software. The digital twin is adapted to reality and considered within collision detection.
Your advantages
- Greater convenience during setup
- Complete safety thanks to automatic collision detection
Improved User Interface & Visualization
Take advantage of the enhanced 3D visualization of data. The material facing and the air facing surface can now be visualized more clearly than ever. In addition, a new data type for contour data has been introduced, making analysis even easier.
Bugfix: Accurate Visualization of the Vertical Focus Probing Surface Vector
In MetMaX 5.0, the visualization of the VFP surface vector has been significantly improved. A new algorithm now accurately identifies the actual surface of the sample, ensuring the mesh is correctly oriented during measurement.
What this means for you:
- Fewer manual corrections: MetMaX 5.0 now reliably distinguishes between the material facing surface (e.g., on a pin) and the air facing surface (e.g., inside a bore).
- More stable results: Correct surface alignment leads to consistent and repeatable measurements, even in complex geometries.
For more details, please watch our What’s New video.
*The MetMaX 5.0 Software Package also includes these new software updates
- LaboratoryMeasurementModule 12.0 (LMM 12.0)
- EdgeMasterModule 12.0 (EMM 12.0)
- ServiceSoftware 12.0
Get your MetMaX 5.0 Software Update
To ensure the compatibility of your measuring device with all software packages, it is necessary to download the following updates in the Alicona Family as well:
LaboratoryMeasurementModule 12.0 | EdgeMasterModule 12.0 | ServiceSoftware 12.0
Your service contract is active?
No or expired service contract?


