World Premiere at EMO 2025: 3D Metrology SensorX integrated in Nagel’s NaPrep Automation Cell
At this year’s EMO, Bruker Alicona proudly presents the world premiere of the SensorX: a next-generation, OEM-ready 3D metrology sensor based on Advanced Focus-Variation technology. See it live in a real application: fully embedded into the NaPrep automation cell from Nagel Maschinen- und Werkzeugfabrik GmbH. SensorX bridges the gap between automation and high-precision inline metrology. Integrated into Nagel’s NaPrep automation cell, it enables closed-loop cutting-edge preparation – fully automated and traceable. Discover how production metrology becomes smarter and more connected.
What you’ll see at our booth
Explore our cutting-edge 3D optical metrology systems in action:
- SensorX – OEM integration live in Nagel’s NaPrep automation
- FocusX + Real3DUnitX – with automatic CAD-based tool alignment
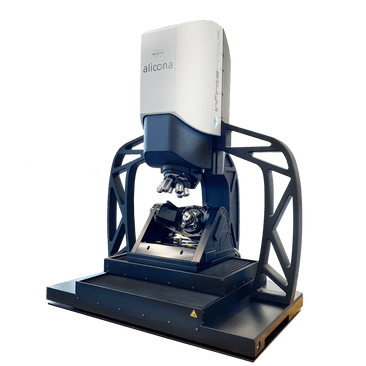
- InfiniteFocus G6 – the Swiss army knife of optical metrology
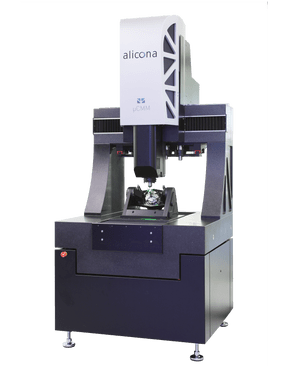
- µCMM – coordinate measurement with full Pick & Place automation
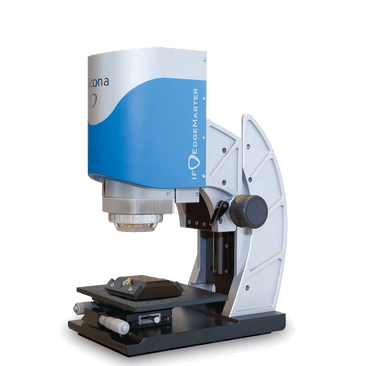
- EdgeMaster – robust cutting-edge measurement in production
👉 Get your free guest ticket!
We’re giving away a limited number of guest passes to EMO 2025. Secure your spot now by contacting us or filling out the request form below.
Request your free ticket today and visit us at Booth D20!
🛠️ Also featured at partner booths:
- DMG Mori – Live measurements using Bruker Alicona metrology in the DemoMate system, Hall 2
- Anca – Tool inspection workflows using the FocusX system, Hall 11
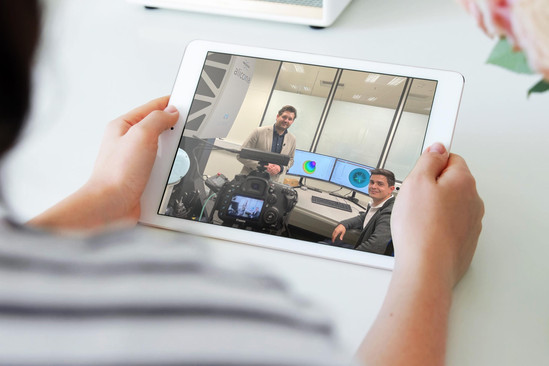
Take a Sneak Peek of our Booth Highlights
NaPrep for the Selective and Defined Rounding of Cutting Edges
Selective and defined cutting edge rounding offers numerous well-known advantages: It reduces the risk of chipping, increases the quality and tool life and improves both chip removal and surface quality.
In NaPrep, Nagel Maschinen- und Werkzeugfabrik GmbH combines process automation and quality assurance from Bruker Alicona in one cell. At EMO 2025, for the first time, the system features the newly developed SensorX, offering advanced measurement precision. This marks a significant evolution in the cell’s architecture, enabling fully autonomous edge preparation with traceable and repeatable results in manless production environments.
%20Nagel-659x439.jpg)
NaPrep: Automated cell for cutting edge preparation with included quality assurance from Bruker Alicona; (c)Nagel
Bruker Alicona's measurement technology is a market leader and much more accurate than tactile methods.
What Else You Will See at Our Booth
Next-Level Precision for Complex Round Tools
See the FocusX in action on a cutting-edge five-axis setup powered by the Real3DUnitX. This configuration features the new Automatic Round Tool Alignment, letting you define measuring positions directly on your tool’s CAD model. During measurement, the sensor automatically detects the tool’s orientation and aligns the process with the CAD data, enabling fast, fully automated inspection of even the most complex round tools.
The Swiss Army Knife of Optical Metrology
Meet the InfiniteFocus G6: your all-in-one solution for high-precision shape and roughness measurement. Engineered for unmatched versatility and robustness, it adapts seamlessly from lab to shop floor. Whether you need maximum flexibility or uncompromising accuracy, the InfiniteFocus G6 delivers both in one powerful system.
Fully Automated, High-Precision Optical Measurement
Experience the optical coordinate measuring machine µCMM in a live demo, featuring a custom part developed with our long-standing partner KERN. A Pick & Place automation system processes a full tray of components, enabling seamless, fully automated measurement cycles.
See the power of Advanced Focus-Variation in action: high-speed geometry measurement, distance and form inspection, precise surface roughness analysis, and the unique ability to measure vertical walls and hole sides at and beyond 90°. Non-contact, repeatable, and traceable.
Robust Cutting-Edge Measurement in Production
Discover the EdgeMaster, our proven solution for precise and repeatable cutting edge measurements. Designed for the demands of production environments, it delivers accurate inspection of edge radius, wear, chipping, and more - even on highly reflective or sharp-edged tools. Built for reliability, the EdgeMaster ensures consistent results you can trust, shift after shift.
Time left to EMO 2025 in Hannover
Explore All Optical 3D Measuring Systems at EMO 2025
3 reasons why you should visit us
Bring your component &
we measure together on site.
Find your ideal measurement solution.
Get to know us in person.
Looking Forward to Your Visit
at EMO 2025
September 22 - 26 | Hannover, Germany
Hall 5 | Booth D20

dieSonne-(14)-2000x857.jpg)
dieSonne-(14)-2000x3000.jpg)
dieSonne-(14)-2000x2000.jpg)
dieSonne-(3)-200x133.jpg)
dieSonne-161-200x133.jpg)
dieSonne-200x133.jpg)
dieSonne-(29)-200x133.jpg)


