Benefit from modern production metrology to reduce setup times, ensure quality and increase process reliability
Particularly high demands are placed on production metrology. As in other areas, it is a matter of high-precision and fast optical 3D measurements, but integration into production results in a number of other special features. Metrology in manufacturing must be particularly easy to handle. The measuring device integrates itself into the production in such a way that the measurement can run fully automatically. Learn about the number of points you have to consider when selecting the right measuring device to achieve this production suitability in production metrology.
Do you need help choosing a suitable measuring device for your production? Do not hesitate to contact us. We will be happy to help you.
The Top 7 Requirements you must consider
before choosing a new Production Measuring Instrument:
#1 Measuring device capability
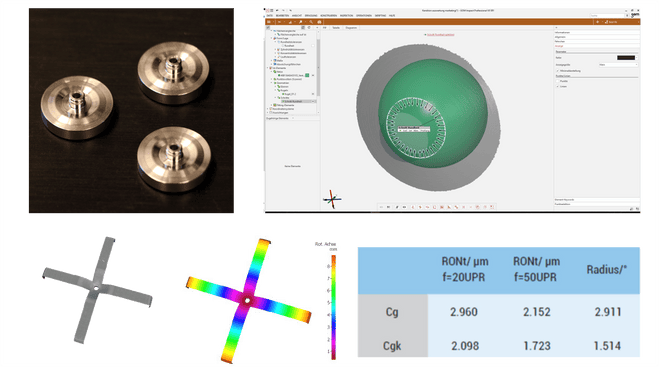
To ensure that your measuring instrument is capable of completing measurement tasks adequately, it is necessary to verify the instrument’s measuring capability and accuracy. These are usually determined based on predefined Cg and Cgk values. Other important factors in production metrology are high repeatability, traceability to national and international calibration standards, compliance with global ISO standards, and low measurement uncertainties.

Using Bruker Alicona, Kendrion is able to measure the roundness of valve seats in a repeatable and traceable manner for optimal sealing.
#2 Usability
In production environments, several machines are simultaneously in use. Thus, the simple and intuitive operation of your manufacturing metrology is indispensable. Single-button solutions and automated measuring procedures ensure constant measurements without user influence.
An example: FESTO (Germany) uses a customized sample holder for 10 parts with additional lightning for the automated measurement process, as shown in the webinar "Measurement on the Shop Floor: Fast and Contactless".
#3 Flexibility
Flexible production asks for flexible measuring systems. Production managers are increasingly confronted with the production of different components in small batches. Thus, various component shapes, types and sizes made of different materials or composites must be measured quickly and reliably. Modern measurement technology must adapt to these varying conditions - ideally, one measurement system covers all measurement tasks regardless of size and surface finish.
The Canadian company Miltera, a prototype and advanced manufacturing facility, shows how flexible the optical µCMM operates. Watch this video clip from the webinar "Measurement on the shop floor: Fast and contactless".
#4 Long-term stability
A measuring instrument's stability is crucial for ensuring high process reliability at all times. When measuring a component at different times over a longer period, results must be consistent, even with varying environmental conditions such as temperature, vibrations or illuminations.
Element Six (UK) relies on the Bruker Alicona Cobot to ensure reliable and repeatable measurement results directly in production.
#5 Future-proof technology
Modern production strategies are increasingly based on integrated production concepts. With Industry 4.0, production systems, machines, and measuring devices communicate with each other to enable adaptive production planning and self-controlled production. In this production concept, also referred to as "Smart Manufacturing", measuring instruments are integrated directly into production: Measuring sensors recognize faulty components and automatically feed this information into the production loop. Production automatically adapts to the new information and corrects the error. To ensure long-term implementation of self-controlled production, the production measuring devices employed must fulfill various requirements. Among these are fully automatic measurements, high-precision sensors suitable for production environments, and interfaces for easy connection and integration into existing production systems.
Kleiner (Germany) operates a fully automated production including the measurement process with the optical µCMM.
#6 Speed
Measurement and setup times are directly related. Short setup times demand high measurement speeds and repeatable, traceable measurement results. The faster measurement results are available, the faster operators can react. Therefore, measurement speed is a key factor in reducing downtime and ensuring fast responses and short process adjustment times, all of which contribute to economic and efficient production without reject.
Manufacturing metrology: STEPPER (Germany) ensures fast and repeatable measurement results with the optical µCMM. This video clip is from the webinar "Measurement on the Shop Floor: Fast and Contactless".
#7 Cost efficiency
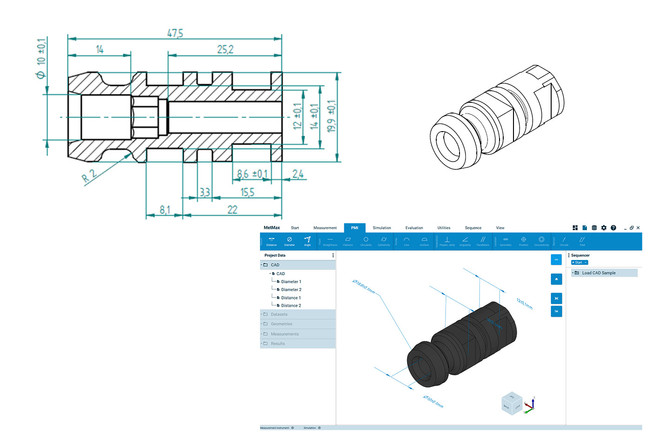
The investment in production metrology must be profitable. A fast ROI, reduced maintenance costs and ongoing operation without consumables are part of the overall calculation. Solutions that increase the efficiency of the entire measuring process are also in demand. This can be implemented, for example, with the operator software MetMaX that enables measurement planning already in the CAD model of the reference component. The tedious and time-consuming definition of measuring positions on the real component thus becomes obsolete. This is particularly attractive if many measuring positions have to be defined and taught in.

The operator software MetMaX, available for µCMM and InfiniteFocus G6, enables the automatic measurement and evaluation of components. Users do not need any specific metrology knowledge to perform robust measurements.
Want to learn more about production metrology in practice?
Watch 16 free lectures from international speakers and Bruker Alicona experts who talk about their experiences in manufacturing measurement technology. The focus lies on modern trends in machining, newer processes such as additive manufacturing and automated production processes by uniting robotics, Artificial Intelligence (AI) and metrology. Here are 2 examples:
Towards uncertainty evaluation with optical coordinate metrology
Coordinate metrology is mainly applied to ensure production quality. Richard Leach, Professor of Metrology at the University of Nottingham, introduces different types of coordinate metrology and focuses on the difference between traditional tactile (contact) technologies and new optical methods. Key aspects in verifying measurement accuracy are the use of standards and the role measurement uncertainty plays.


Accuracy and usability of the µCMM coordinate measuring machine in production metrology
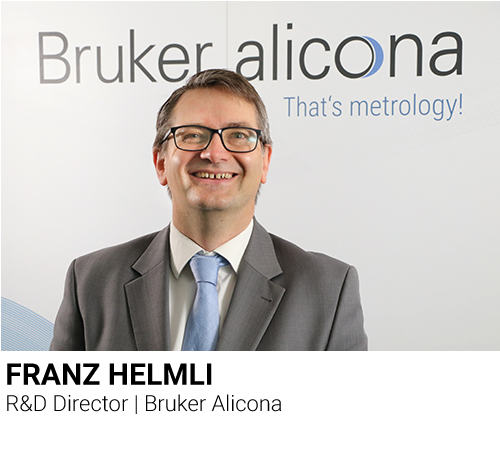
High measurement accuracy and high usability are absolute "musts" when it comes to verifying complex geometries. In this session, R&D Manager Franz Helmli presents how the Bruker Alicona optical coordinate measurement system µCMM meets these requirements. The focus of this session lies on the MetMaX operator software, which is designed for users without special metrology knowledge. This session also includes measurement planning in CAD, measurement automation, and reporting functionalities.


